


 2025 Season - General Maintenance.
Unstepping the mast, replacement of the standing rigging.
Refurbishment of the mast and its components.
Restoration of the mast step.
Dismantling and repair of the jib reefing system.
Lazy Jack modification.
Navigation lights replacement.
Engine mount replacement.

|
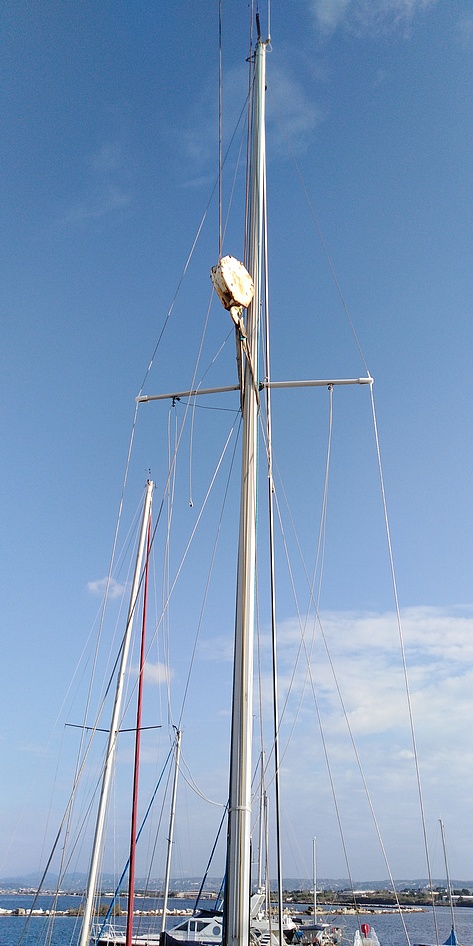
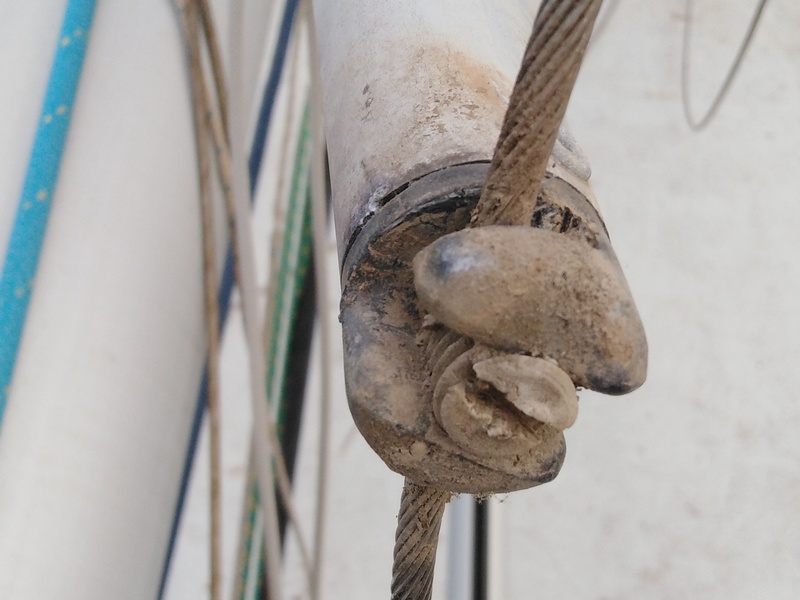
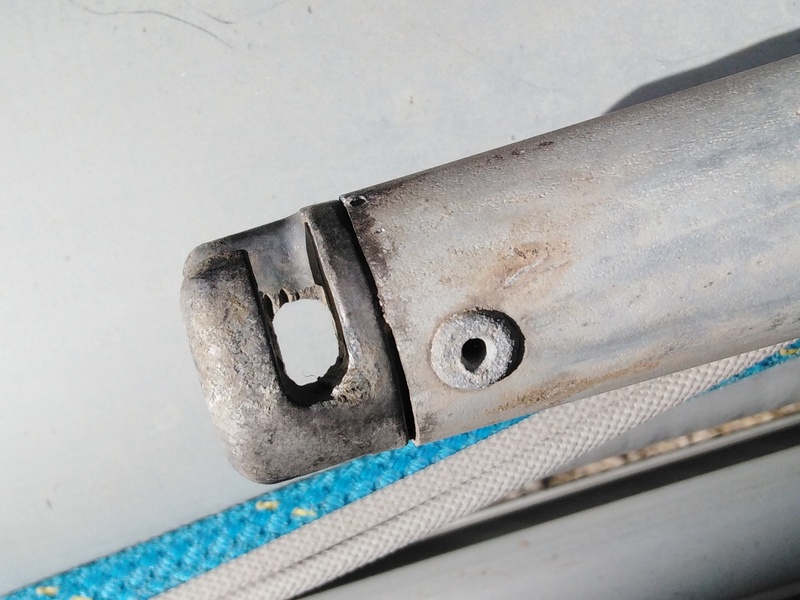
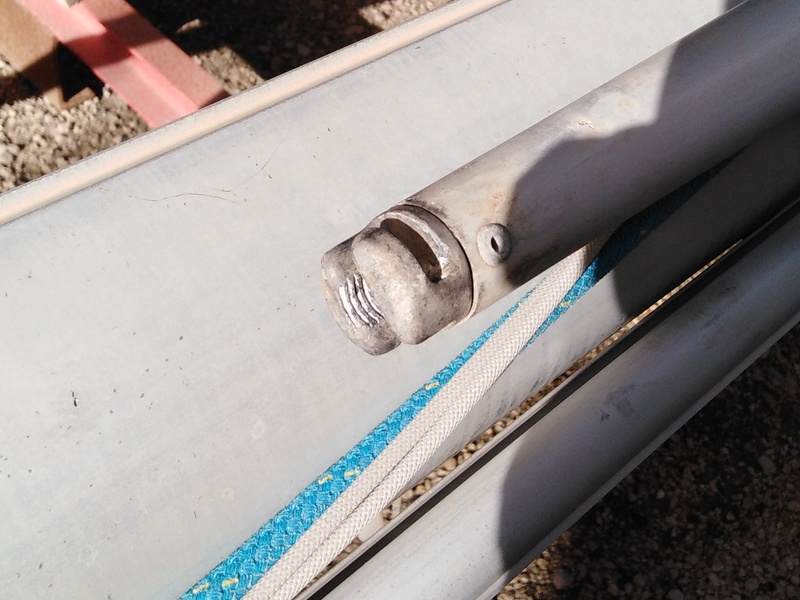
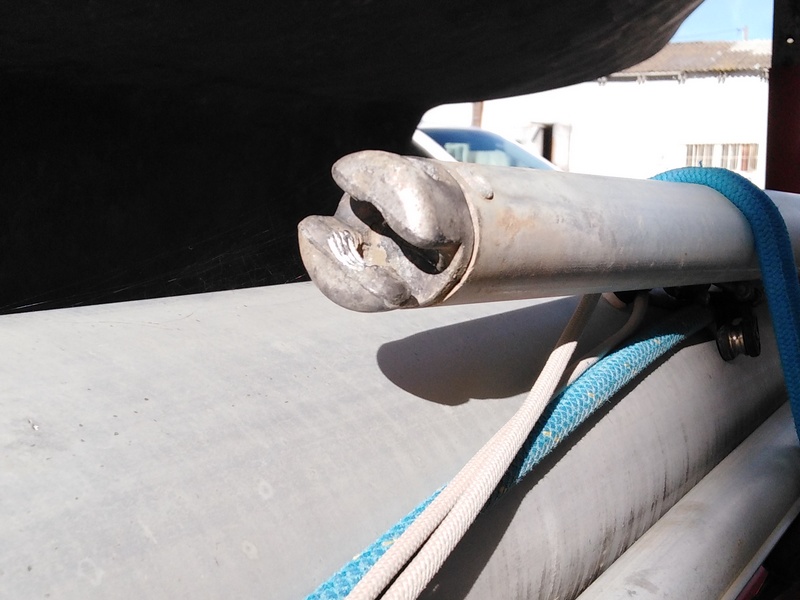
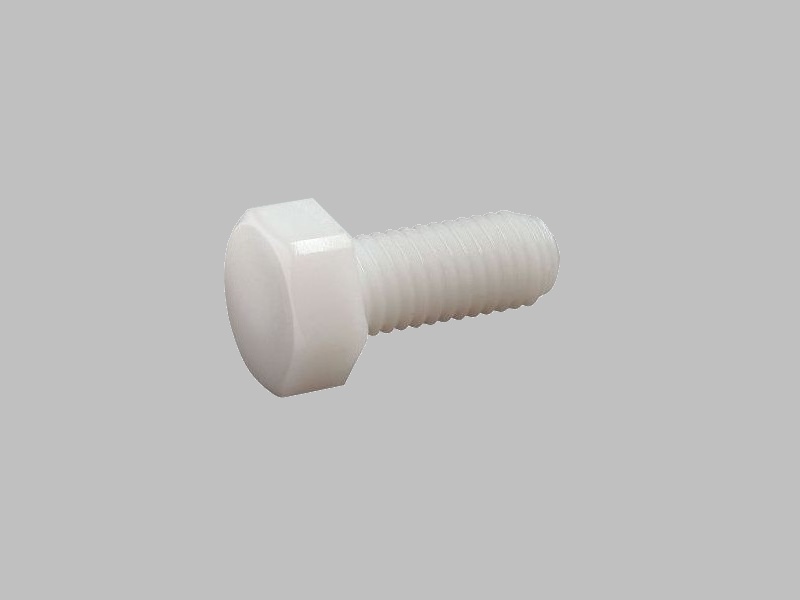
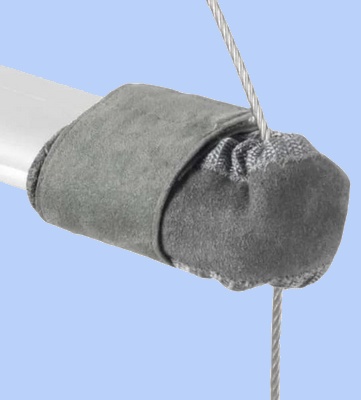
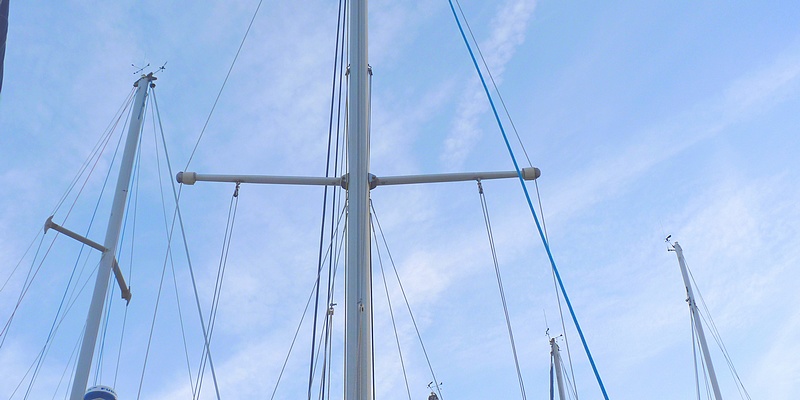
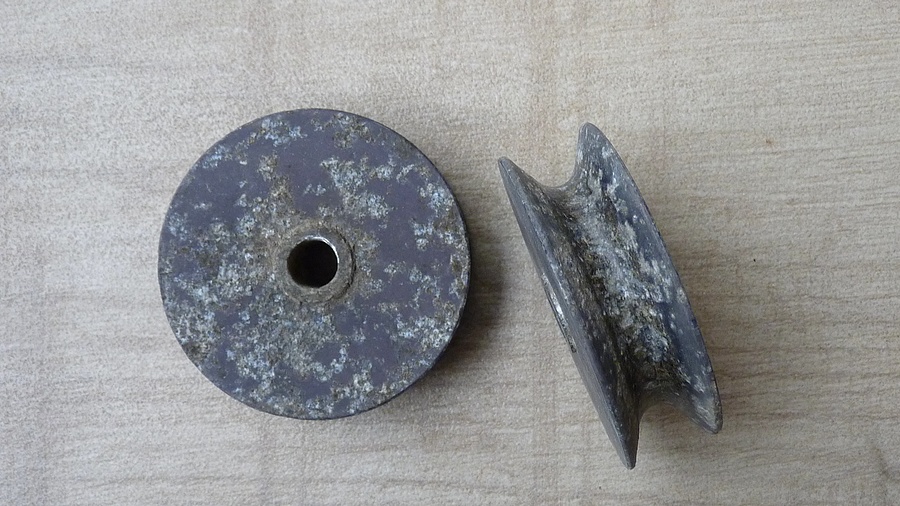
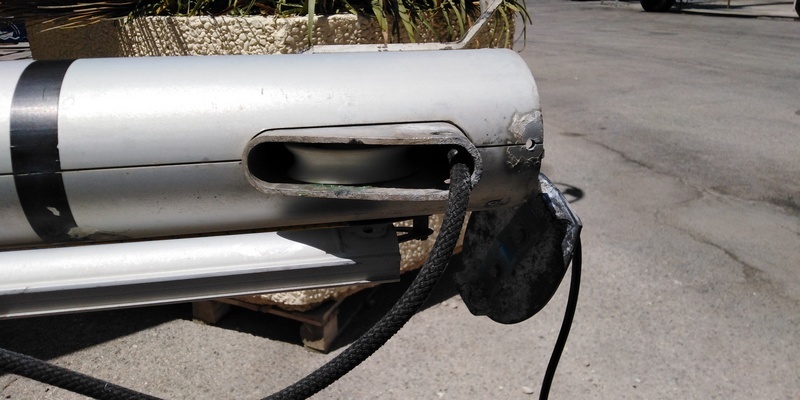
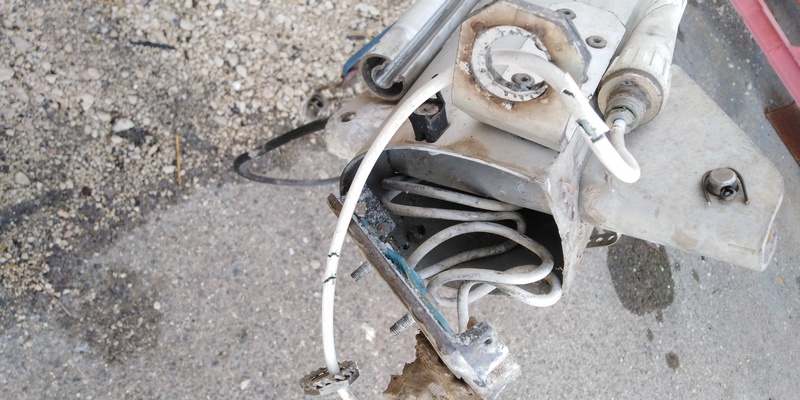
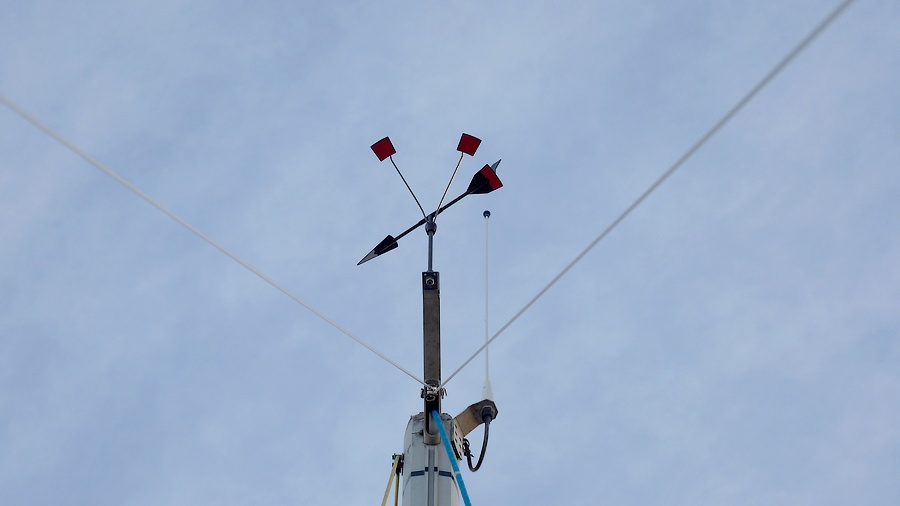
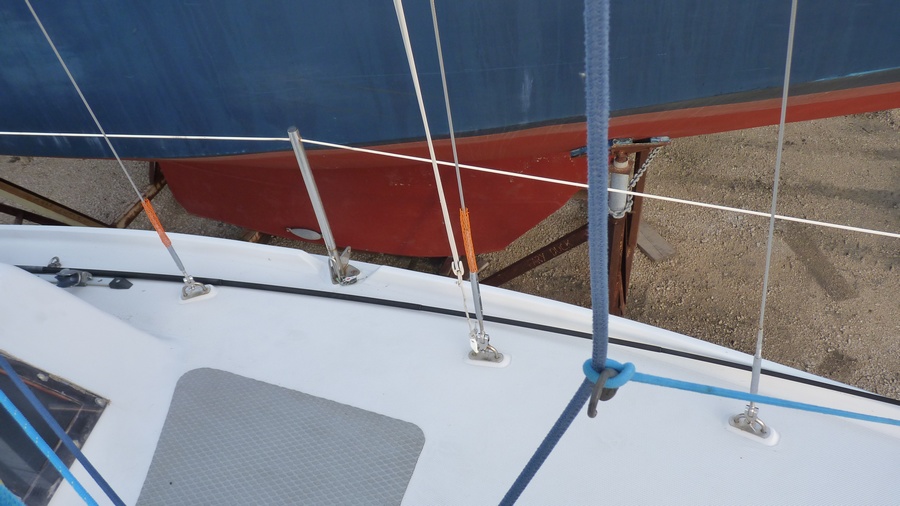
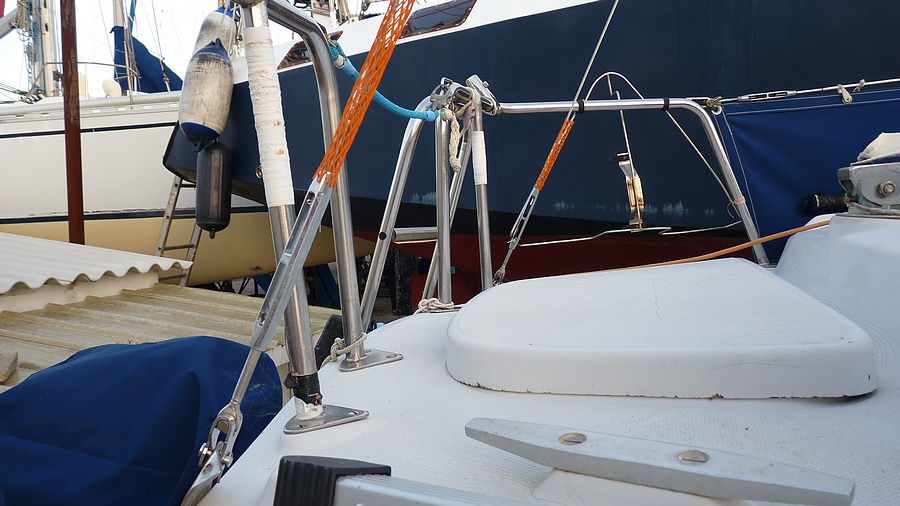
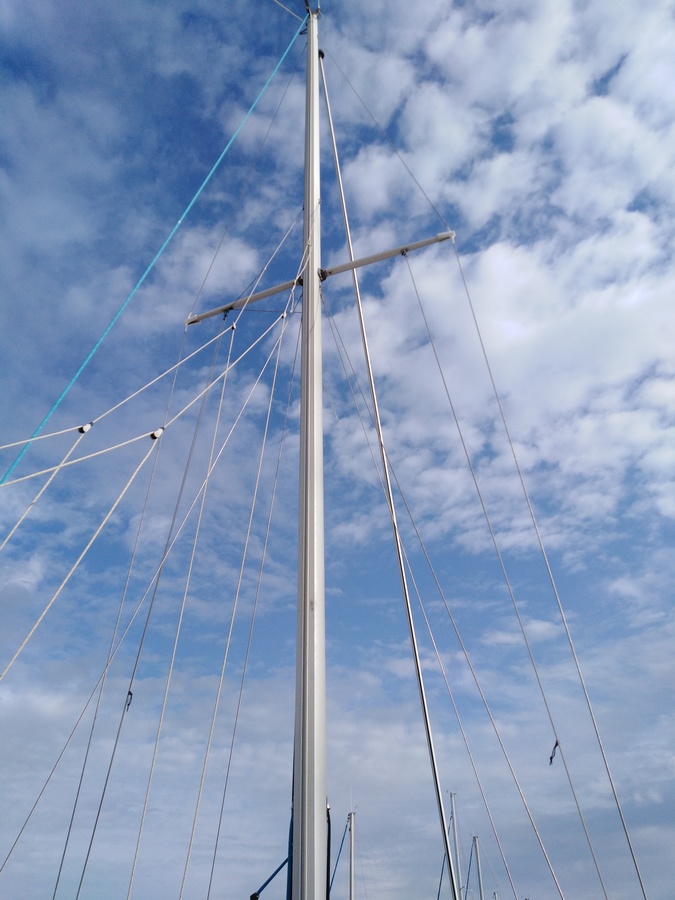
Several reasons necessitated this maintenance. Firstly, regular assessment of the mast's condition is essential for the ship's safety. The mast step was showing a serious problem. Another issue was insufficent backstays tension. The shrouds were generally worn, and an extraneous fitting had been added to the port topstay—solid, certainly, but questionable. The electrical and coaxial antenna cable exits, exposed to the elements and UV rays, were now deteriorating. The two aluminum alloy sheaves at the masthead were oxidized and no longer rotated properly. Upon examination, I discovered that they were seized by oxidation on their axles and had lost their safety pins. The wind vane and the top-light were also no longer functioning. In short, everything deteriorated almost simultaneously. The restoration began with a complete cleaning of the mast and its associated components. The gennaker halyard pulley was replaced with a new Harken brand one. The slideshow opposite shows various stages of the disassembly and reassembly of certain parts of the mast, along with explanatory commentary. The two spreader locking screws on the shrouds, damaged during disassembly, were replaced with two nylon bolts with hexagonal heads, of the same diameter and thread pitch, supplied by EFP Industrie Shop. This will make them easier to unscrew next time. As before, a leather and textile chafe guard with a very practical Velcro strap was fitted to the ends of the spreaders. The new standing rigging was made by Universails Les Voiles de Saint-Mandrier. |

|
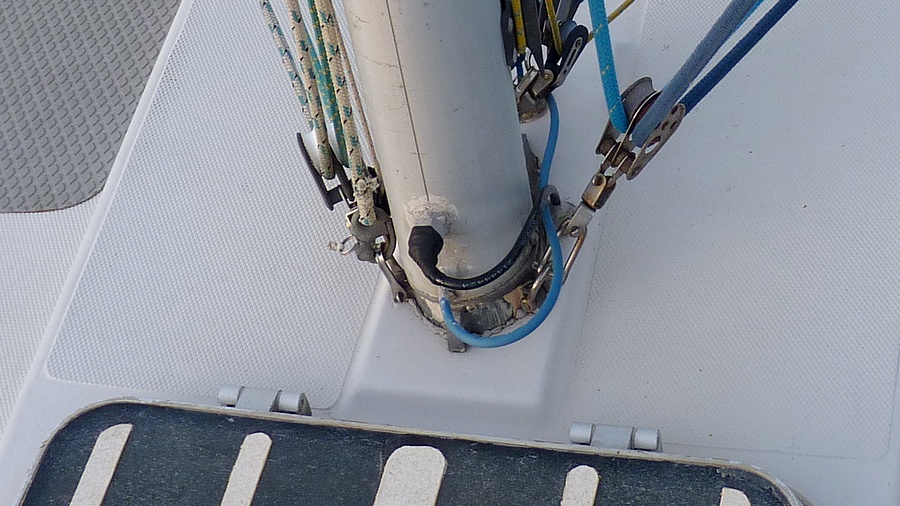
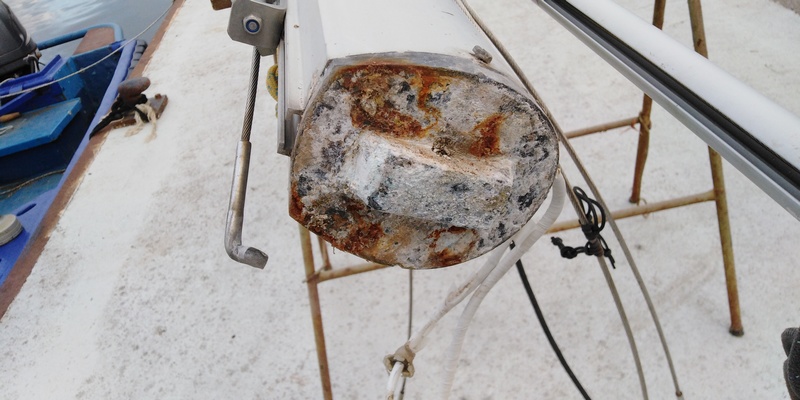
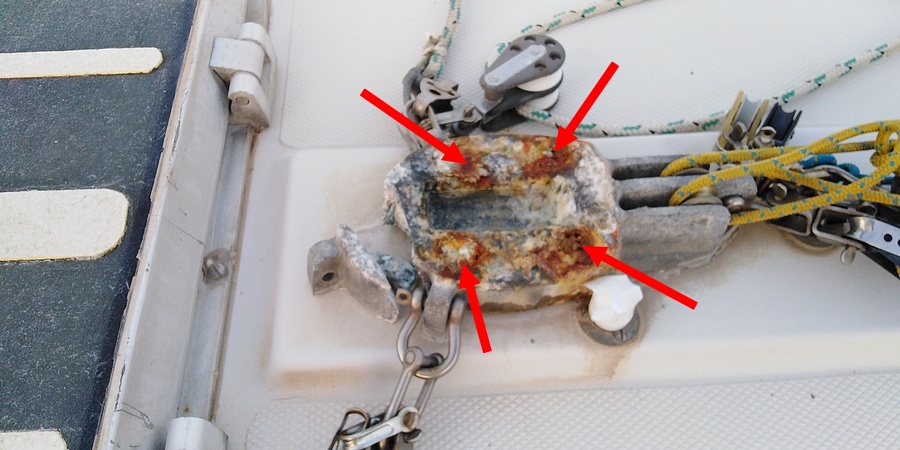
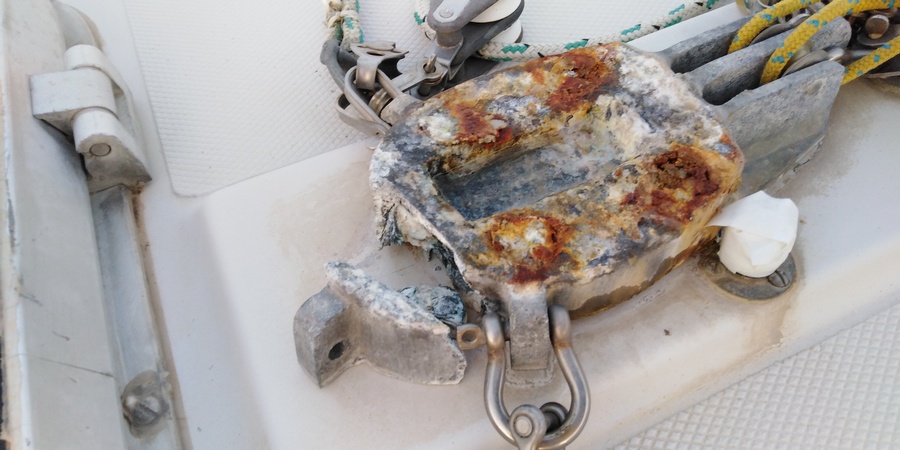
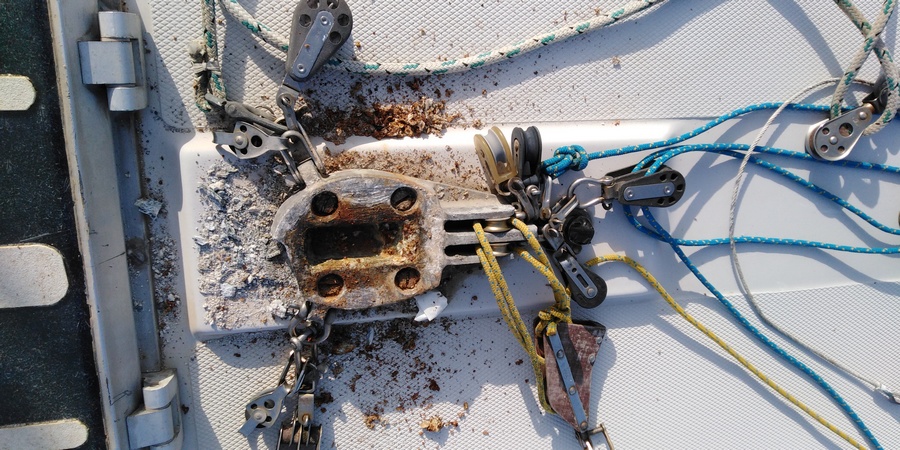
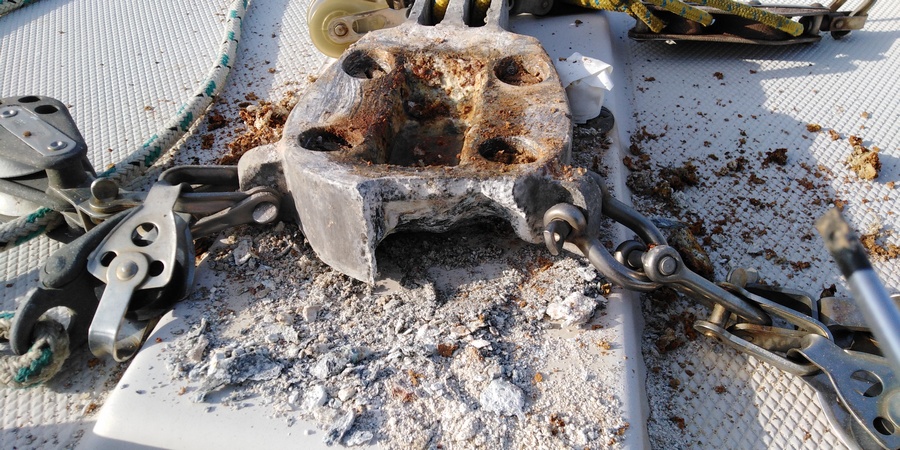
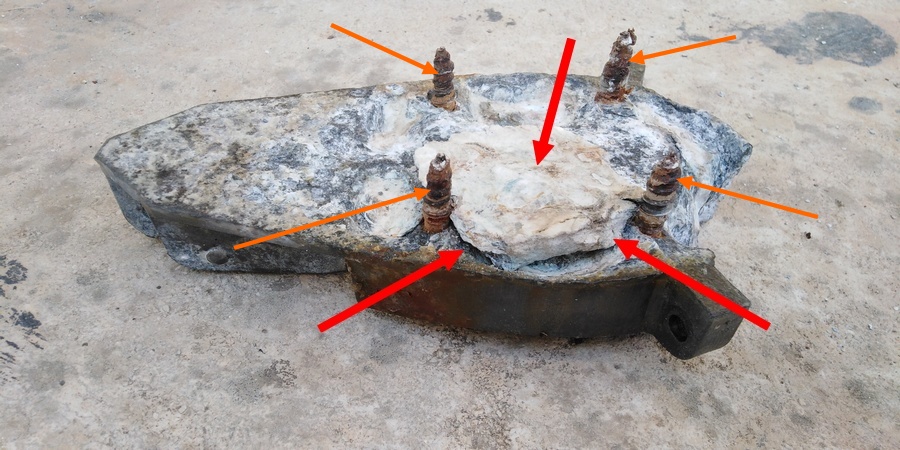
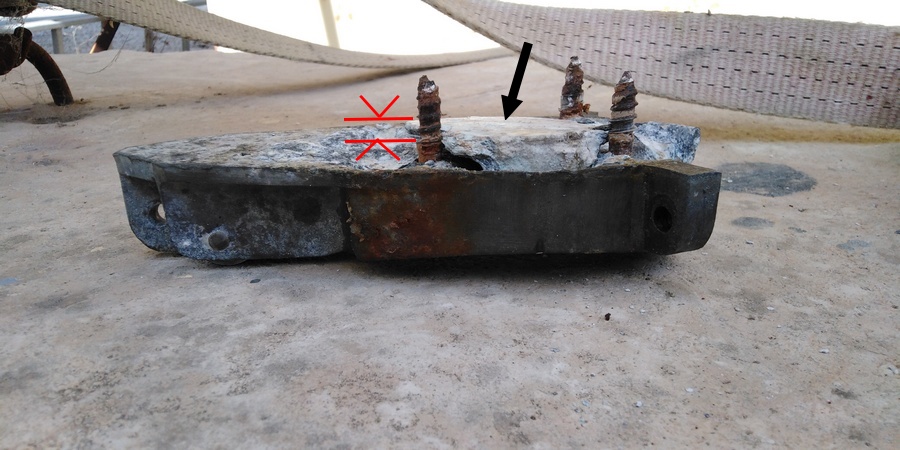
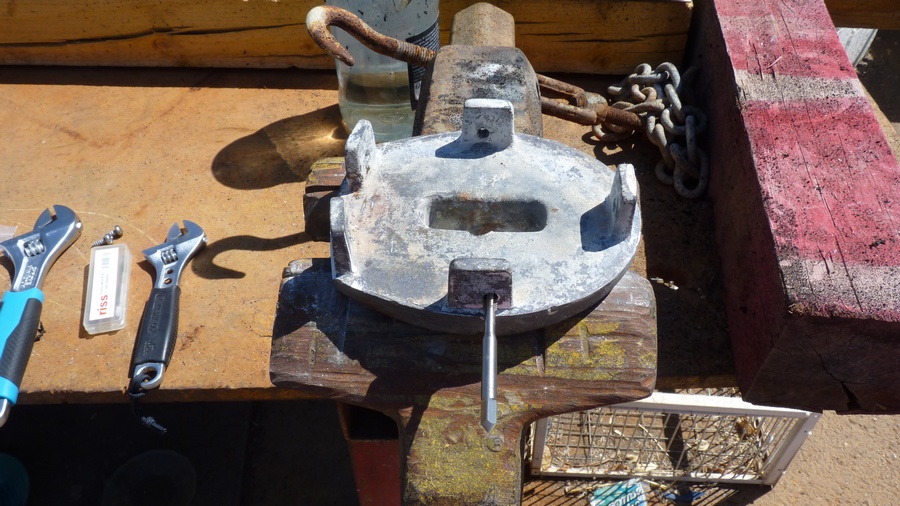
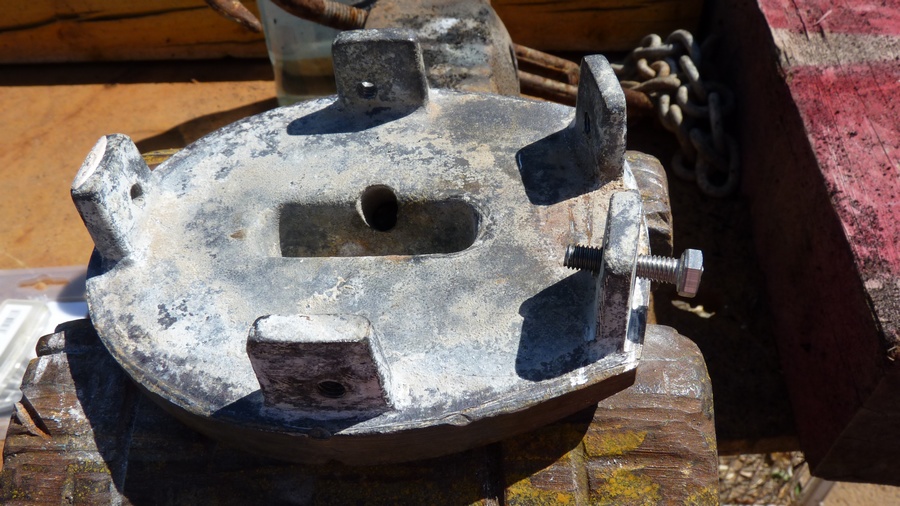
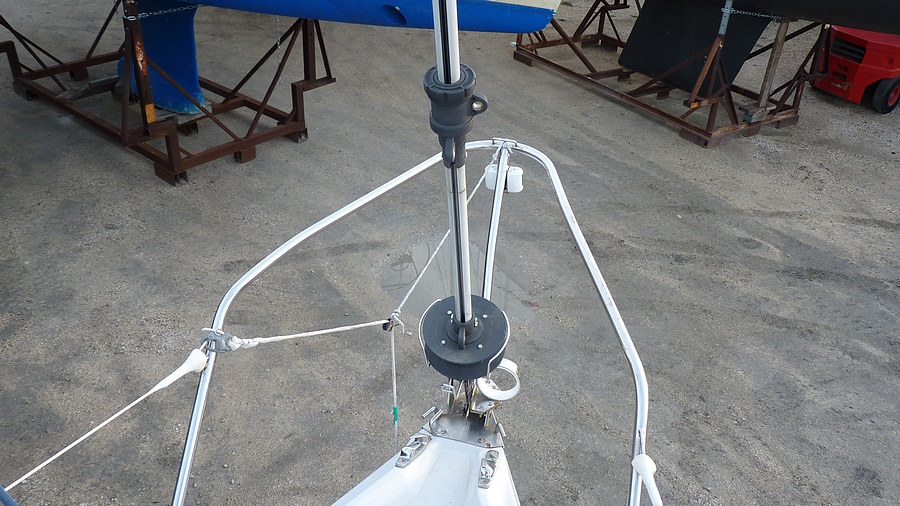
Removing the mast allowed for examination of the aluminum alloy mast step. It had lifted due to corrosion, which caused a bulge of aluminum oxide between the mast step and the deck, lifting both the step and the mast by several millimeters. Consequently, the deck also sagged slightly under the pressure of the rigging. Furthermore, the mast step was secured with ordinary iron lag bolts (!!!). Because the sealant was no longer waterproof, water seeped into the bolt holes, causing rust and dampness in the wooden reinforcement located under the deck. This reinforcement was embedded in a layer of fiberglass, which was supposed to hold the lag bolts in place. The mast step was so badly oxidized that it was disintegrating from the inside, and during dismantling, the front part broke off. The lag screws, however, no longer held anything in the wet wood. Several weeks of drying were necessary before the repaired mast step could be reinstalled. During this time, the depression at the place of the mast step had disappeared and the deck had regained its original flat shape. Longer lag screws were also used during reassembly. It turned out that the mast step was repairable. This repair was carried out by "Société de mécanique générale industrielle et marine" - SGM in Martigues. |

|
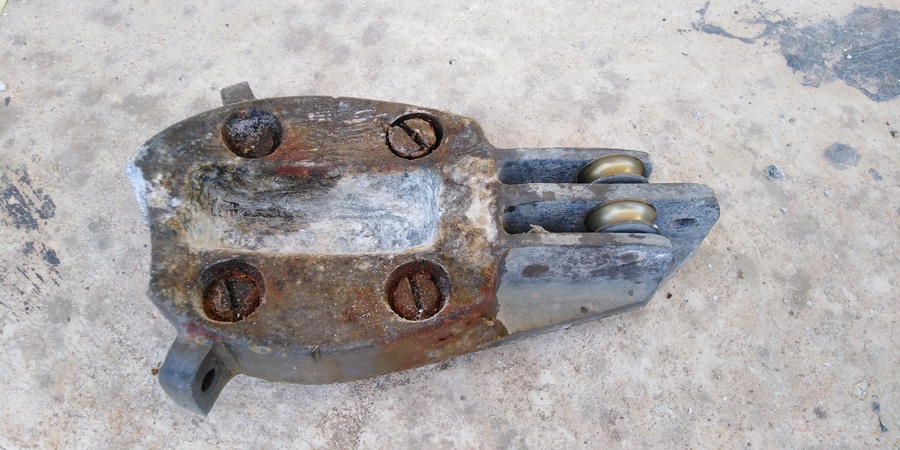
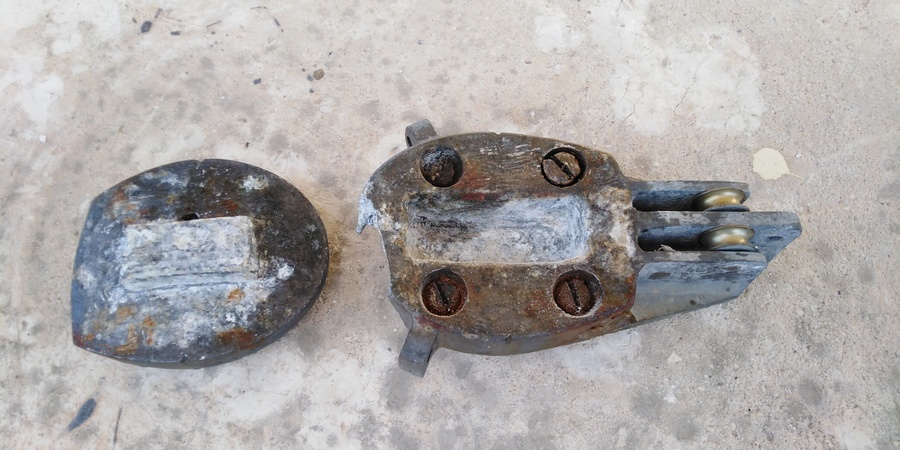
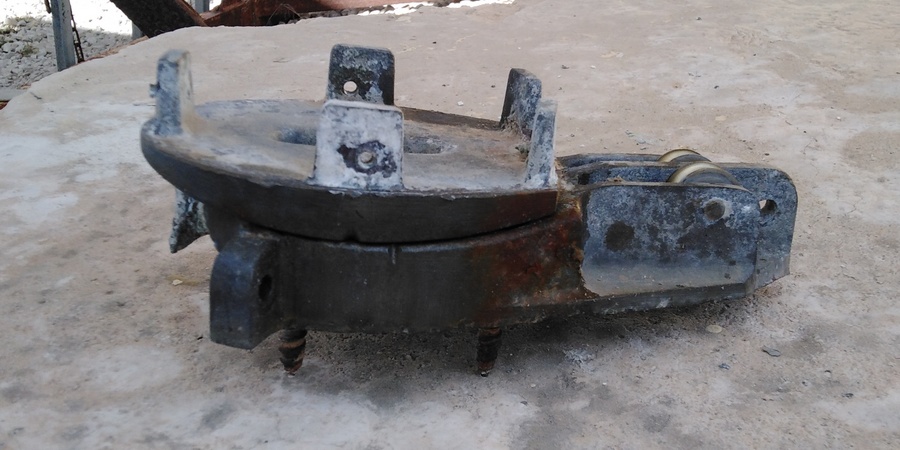
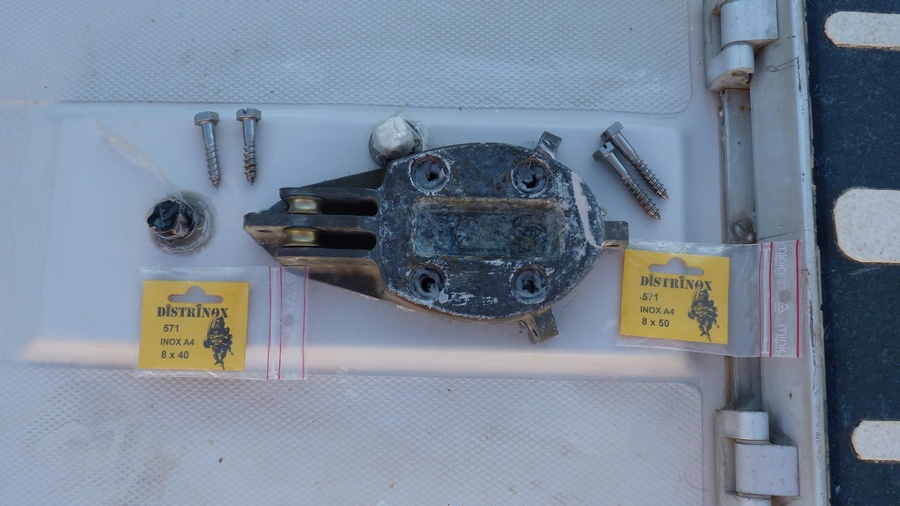
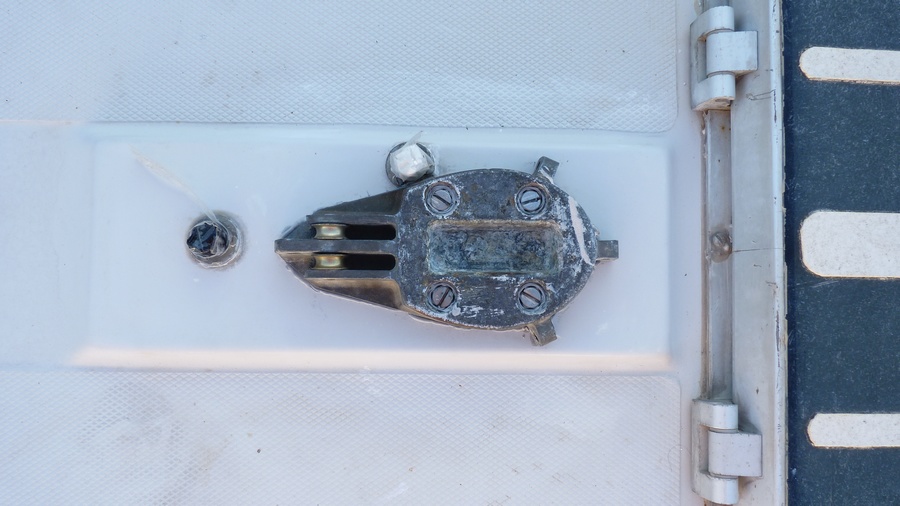
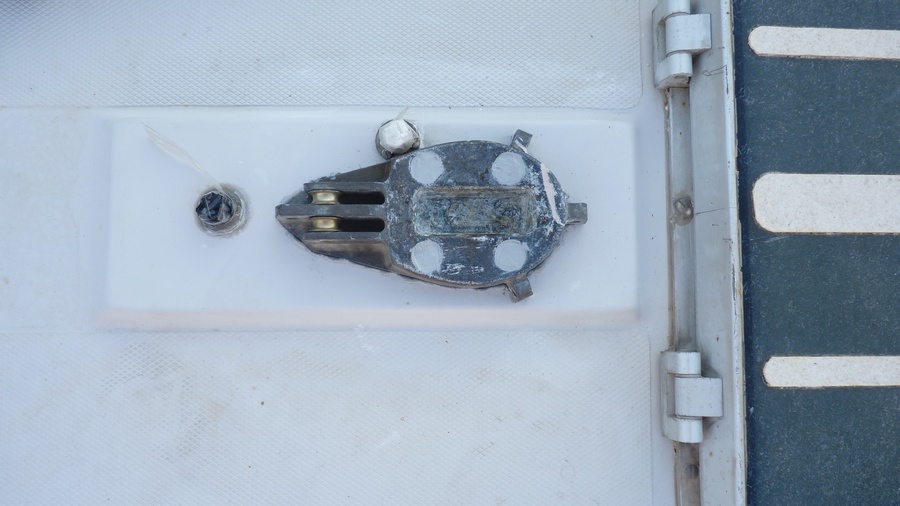
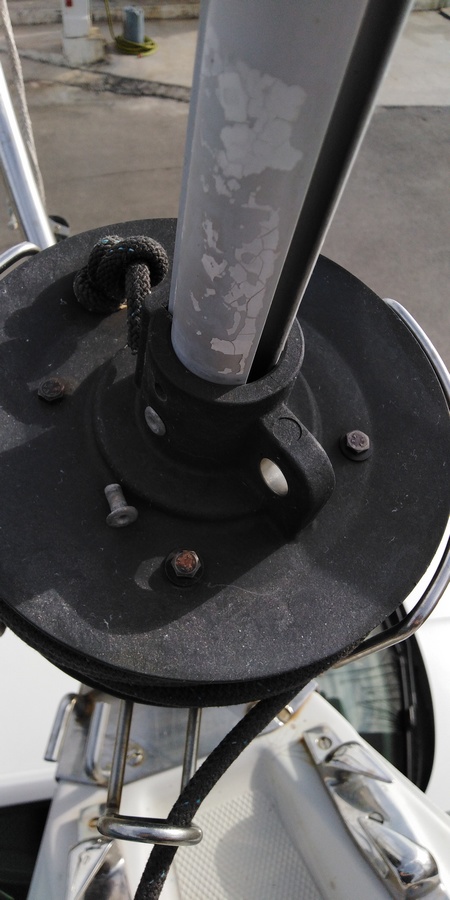
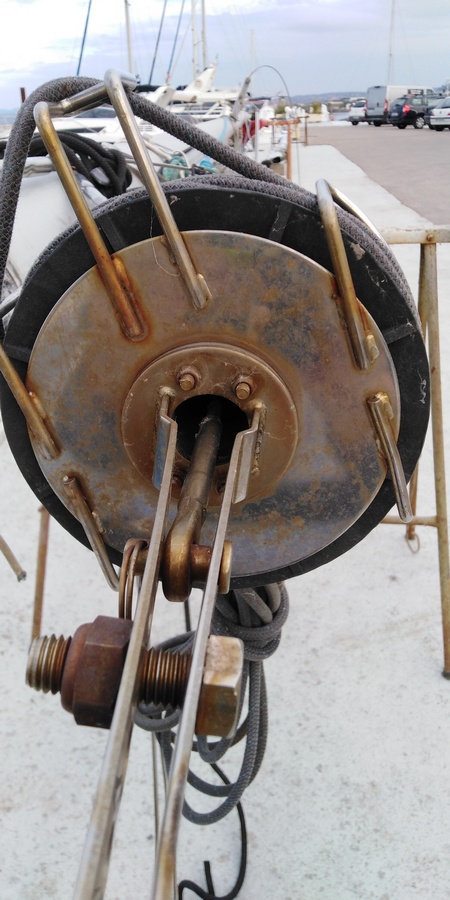
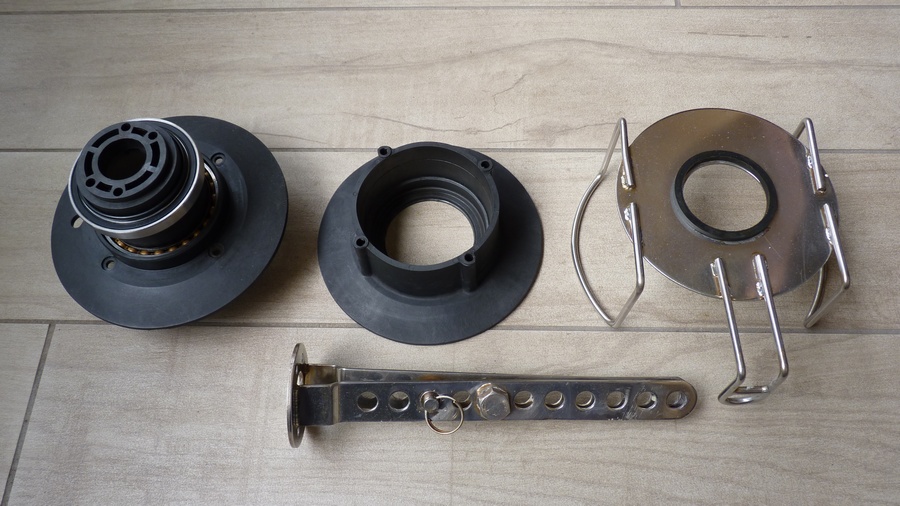
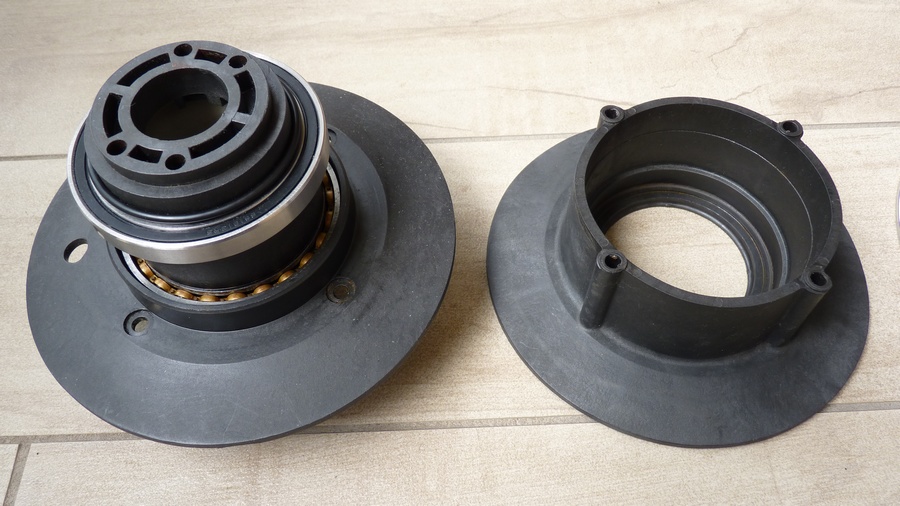
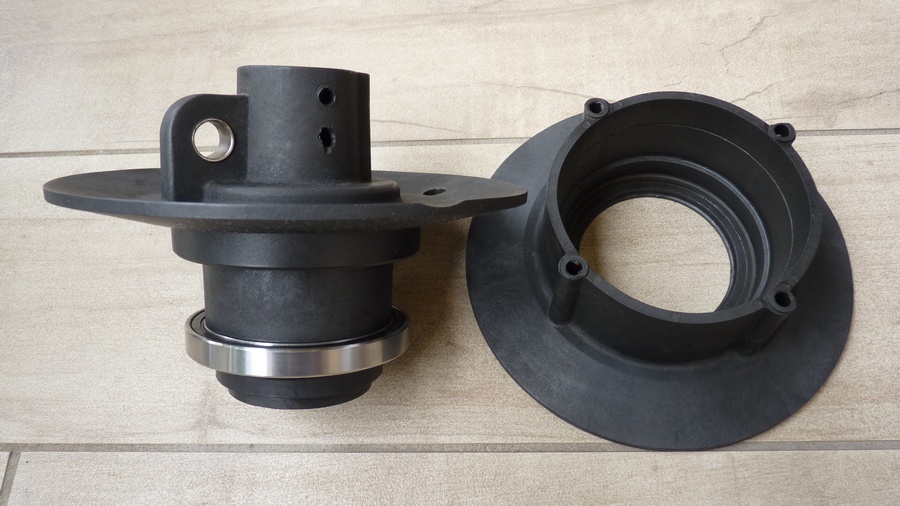
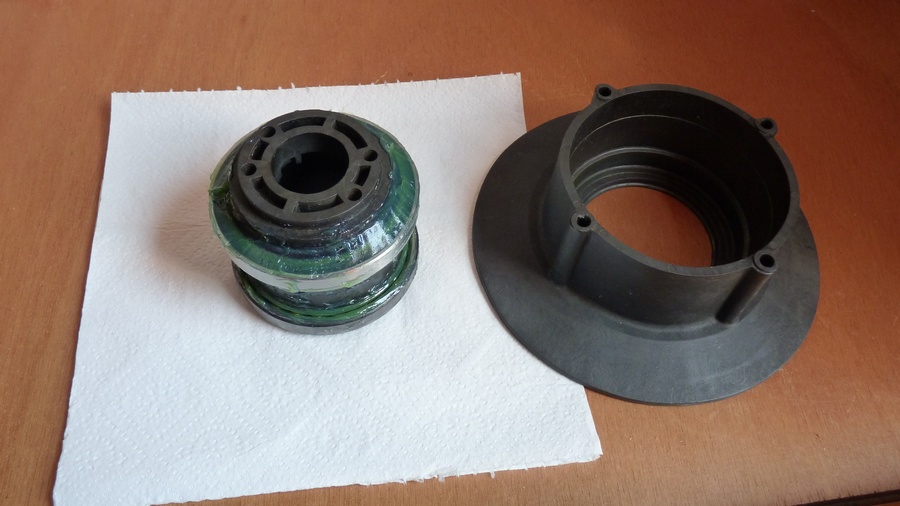
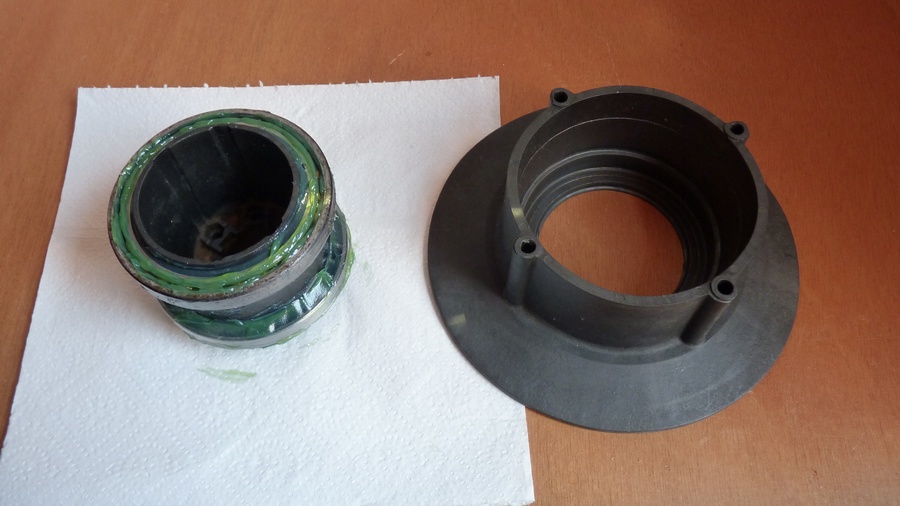
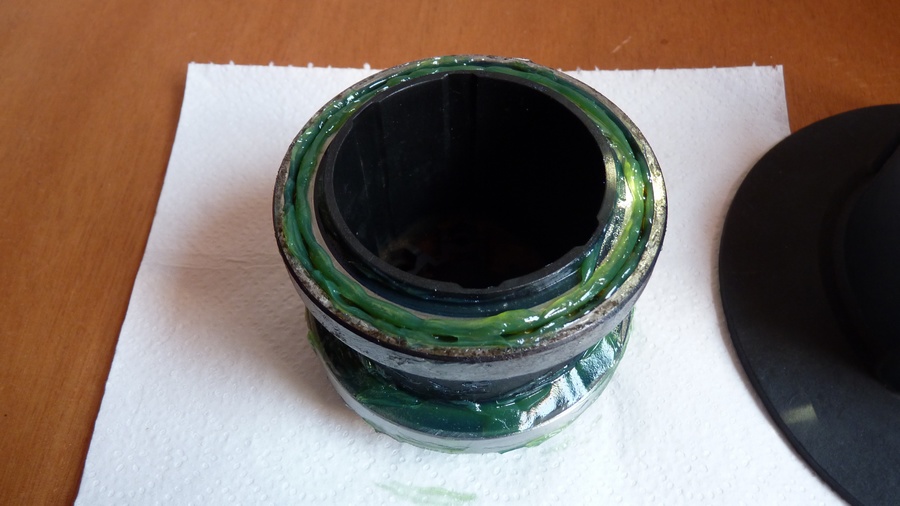
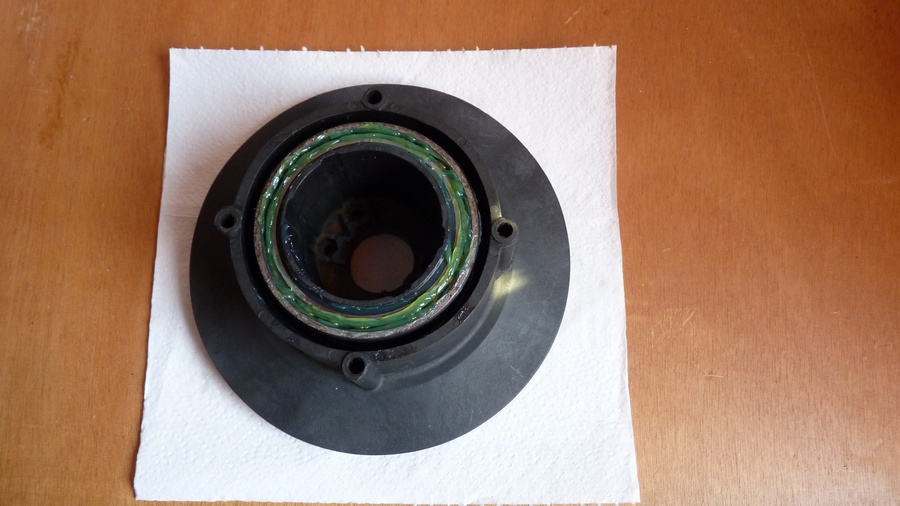
The genoa furler had become very stiff, and upon disassembly, one of the bearings was completely seized and rusted. The second bearing was in good condition. The fact that it still turned with difficulty was because the drum was rotating around the seized bearing. This Plastimo furler uses standard bearings. The replacement bearing was chosen in stainless steel.
Despite its design intended to prevent water from entering the drum unit, the drum is not completely watertight. When the bow hits a wave, under certain conditions water may enter. The manual states that no maintenance is necessary, but obviously, after a number of years, it would be useful to have the entire assembly serviced, and certainly as soon as any resistance to furling is noticed.
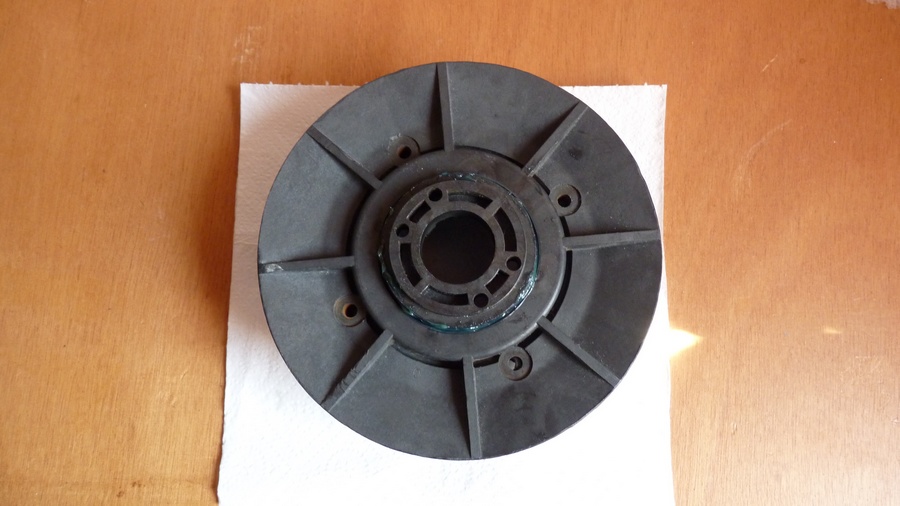
The various parts were cleaned, as well as the stainless steel frame. The halyard swivel, although less exposed, was also checked. It also contains two standard ball bearings. It can be difficult to open if the cap that closes it has been overtightened. All the parts of the furler (drum unit, profile, halyard swivel, etc.) were assembled with rivets. During reassembly, the rivets
were replaced with hex head screws. This will allow for easier maintenance if necessary. Below, by clicking the link, you will find the user manual for this furler, which also includes an exploded view of its component parts.
However, there is no information regarding the disassembly of the drum and swivel... |

|
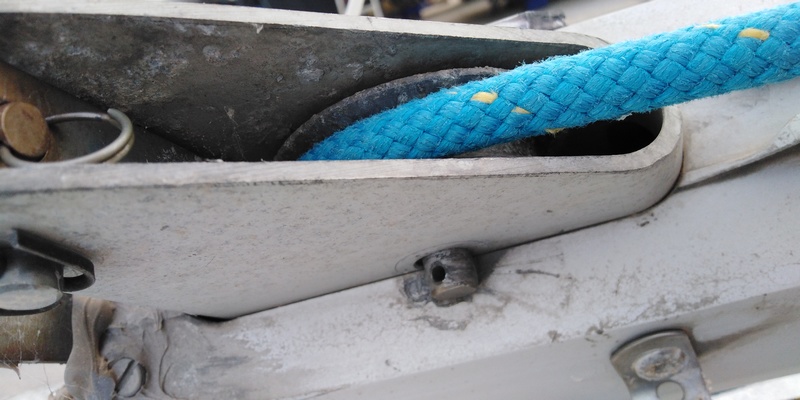
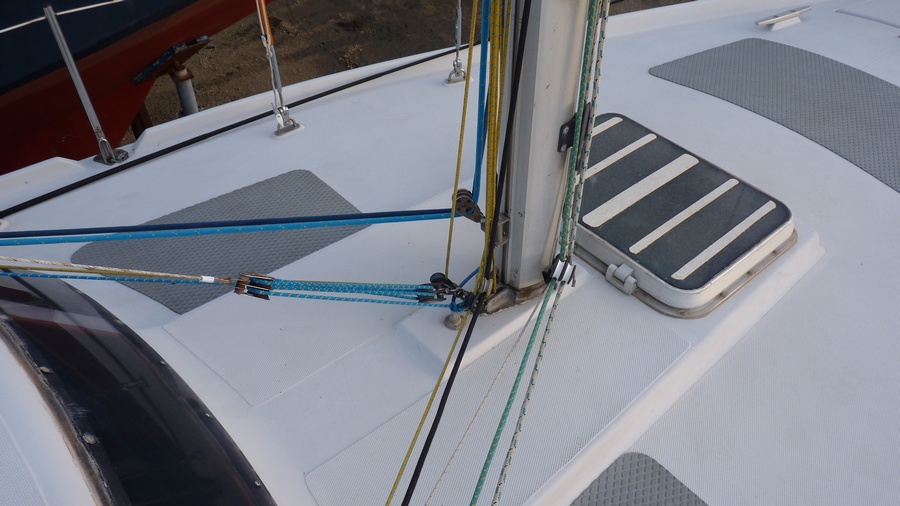
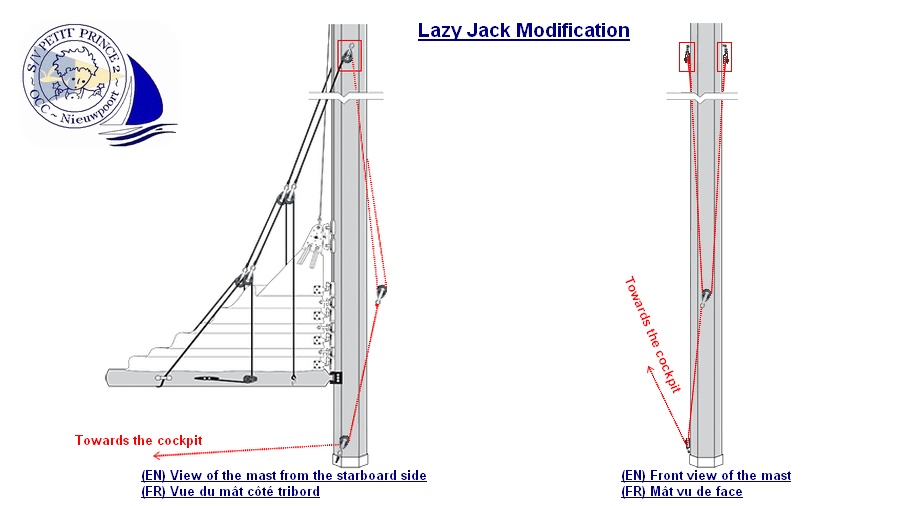
The lazy jack installed on the boat never worked properly. The problem was due to the design of the adjustment cable returning to the cockpit. This model of lazy jack was designed to be manually tightened or loosened from the boom. The upper attachment points are fixed to a small bridge on both side of the mast above the spreaders. Two additional lines, knotted on the top lines and passing through small pulleys attached below the spreaders, provided the return to the cockpit. The travel was insufficient, making it impossible to adjust the lazy jack to avoid chafing with the sail, or requiring manual adjustment on deck. The solution was to install two pulleys at the attachment points on the mast and follow the diagram shown in the accompanying slideshow. Tension is then easily adjusted from the cockpit, and the balancing on both sides is automatic thanks to the back-and-forth motion of the central pulley. This system also allows the lazy jack to be fully opened or closed very easily. One drawback, however, is the chafing of the pulley of the back-and-forth on the mast, quickly solved by placing a protection at this point. |

|
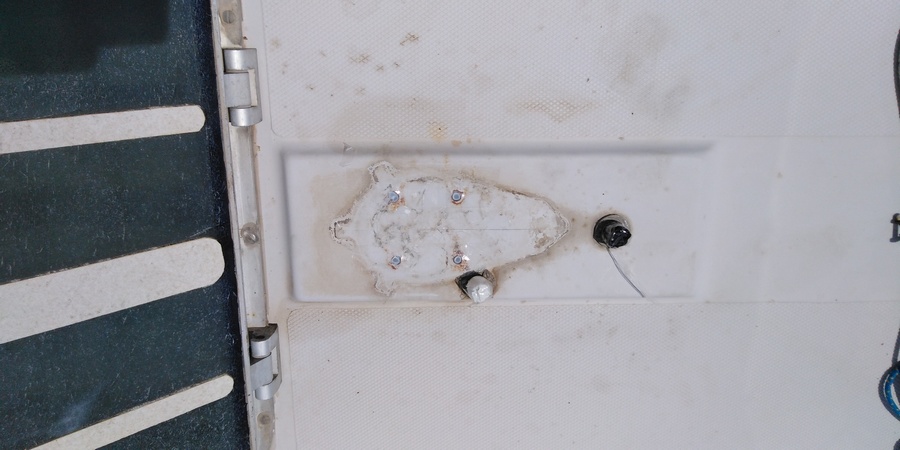
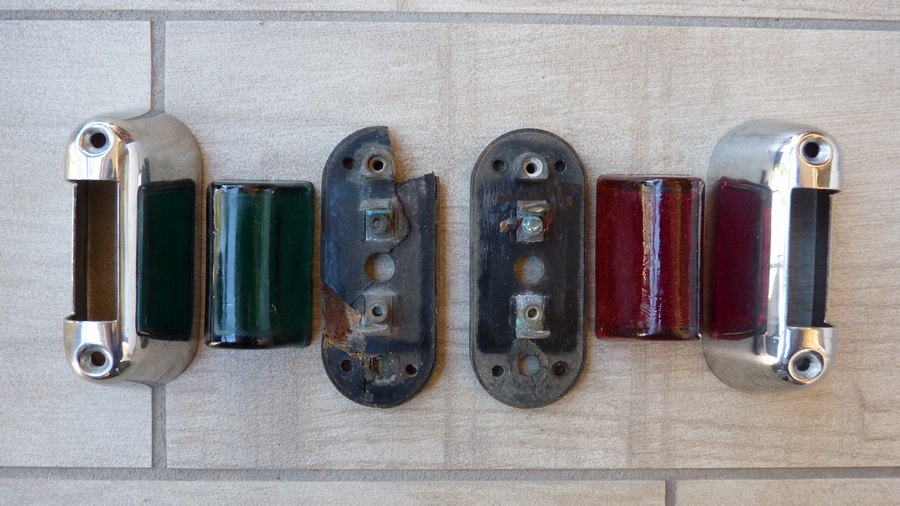
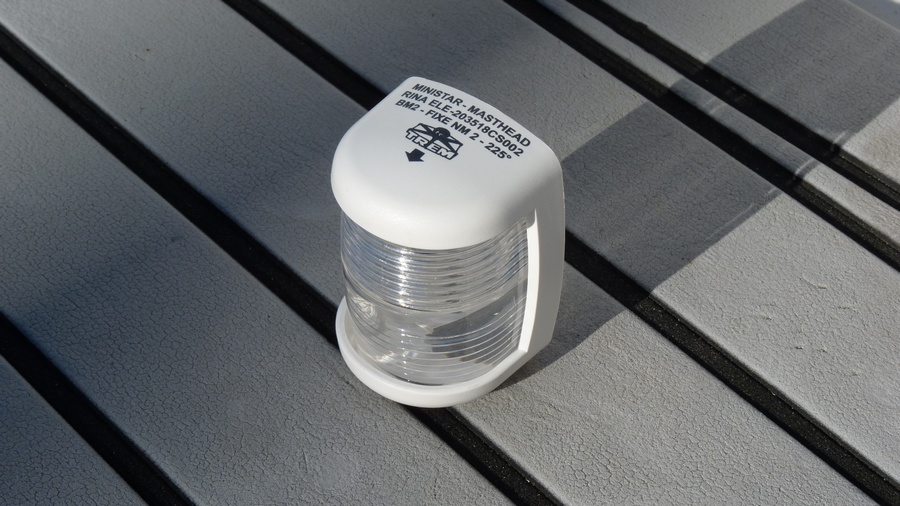
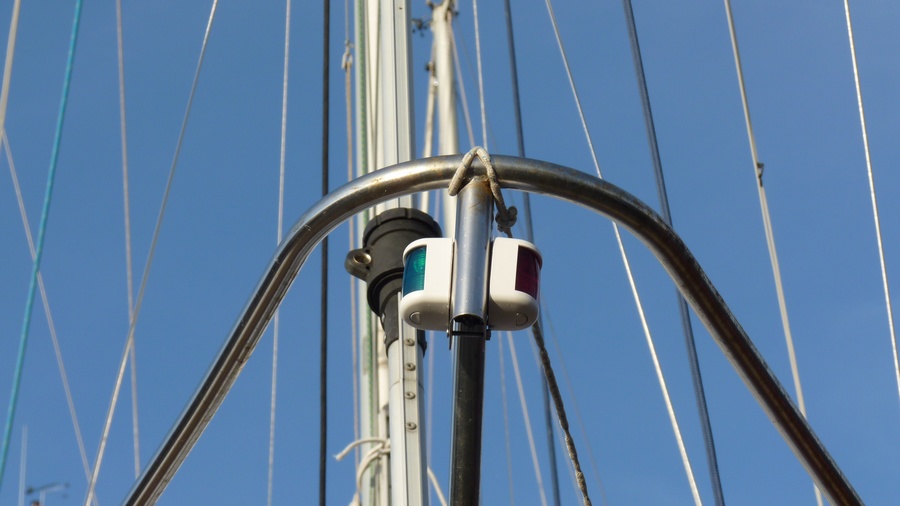
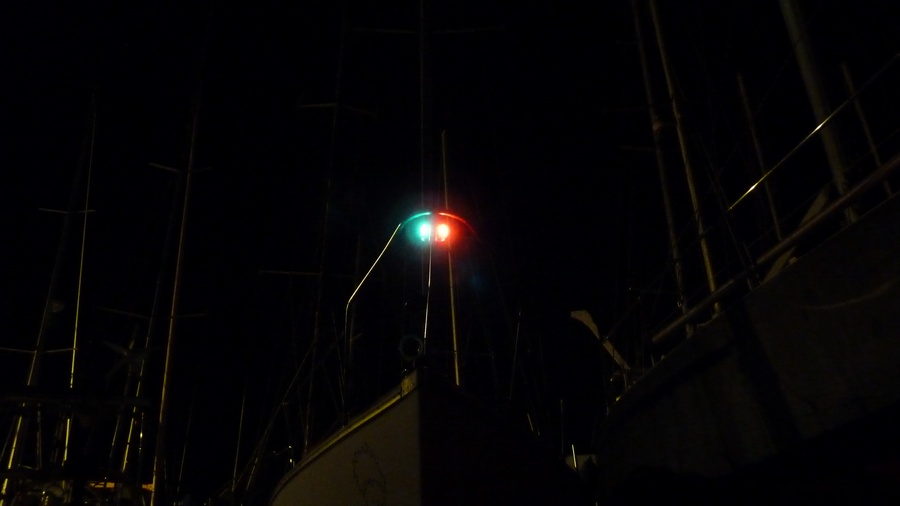
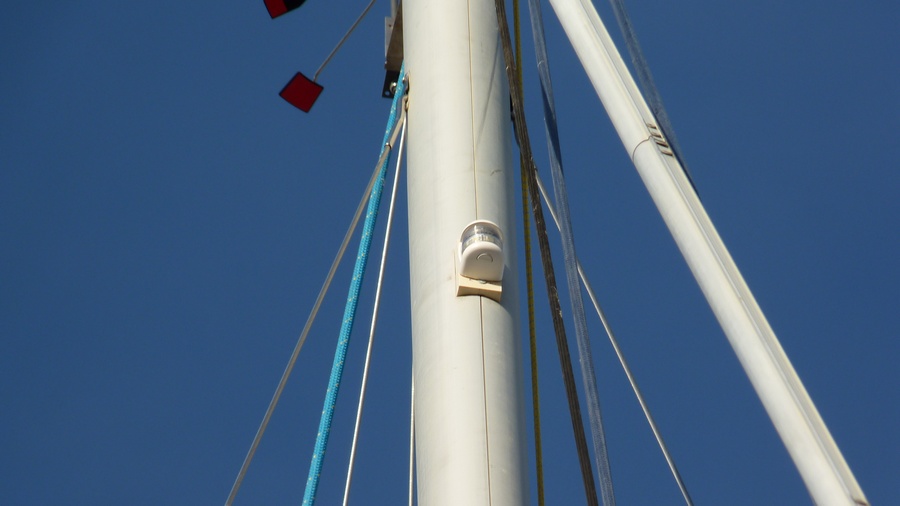
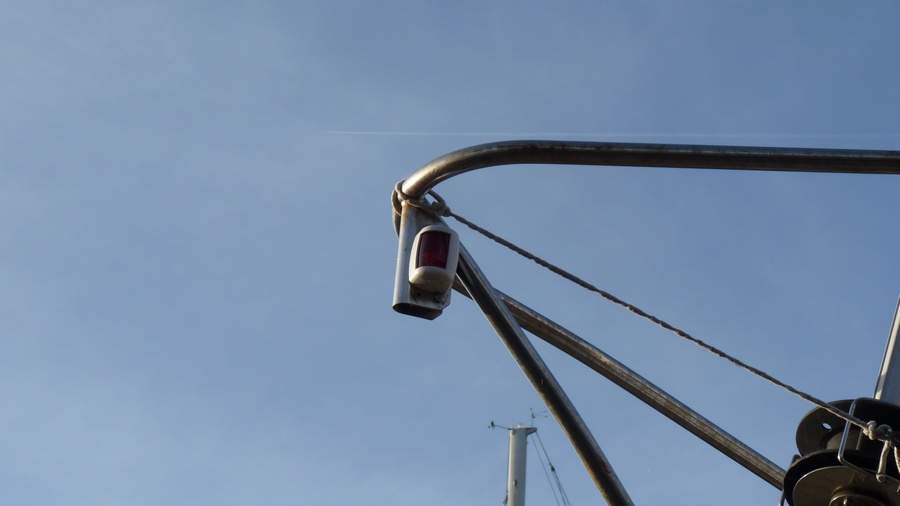
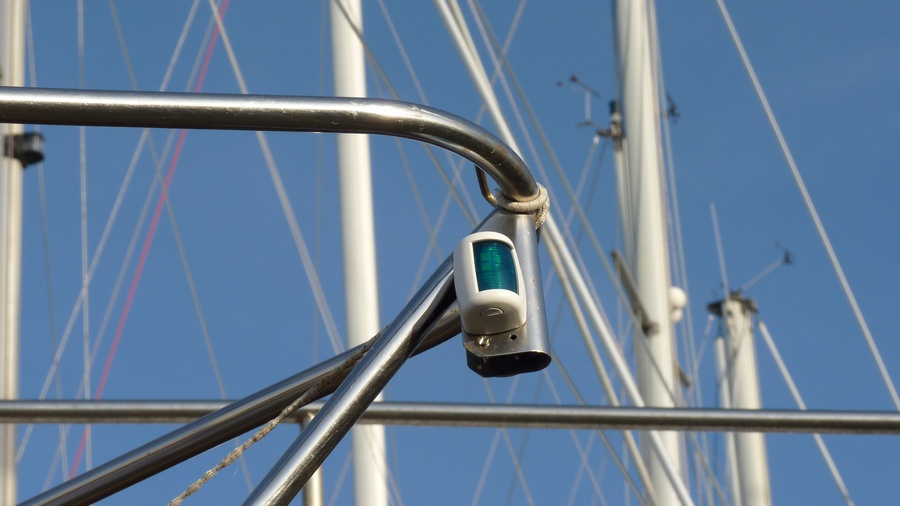
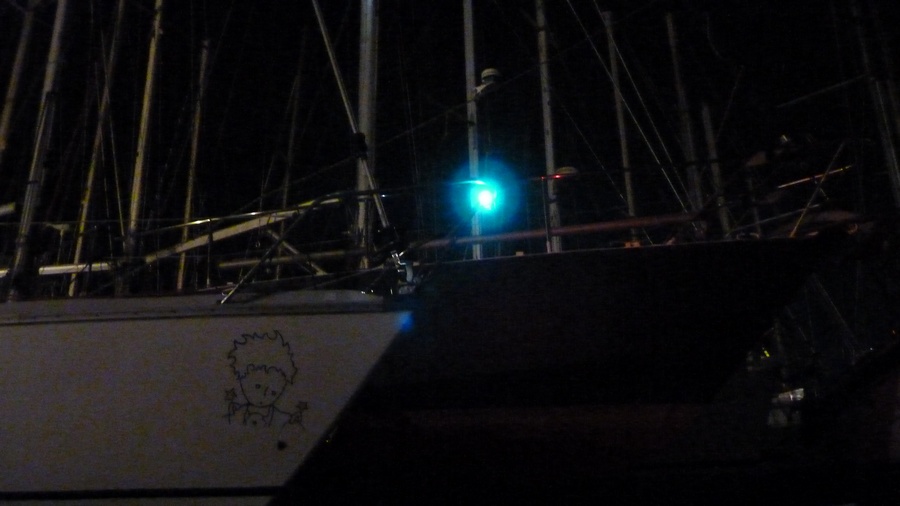
After forty-six years of service exposed to the elements, salt air, and the sea itself, the navigation lights were now in poor condition. They were no longer watertight. The Bakelite mounts were disintegrating. Repaired several times, they were no longer usable. Furthermore, despite their attractive retro design, compared to more modern navigation lights, their design was too outdated. Also designed for filament bulbs,
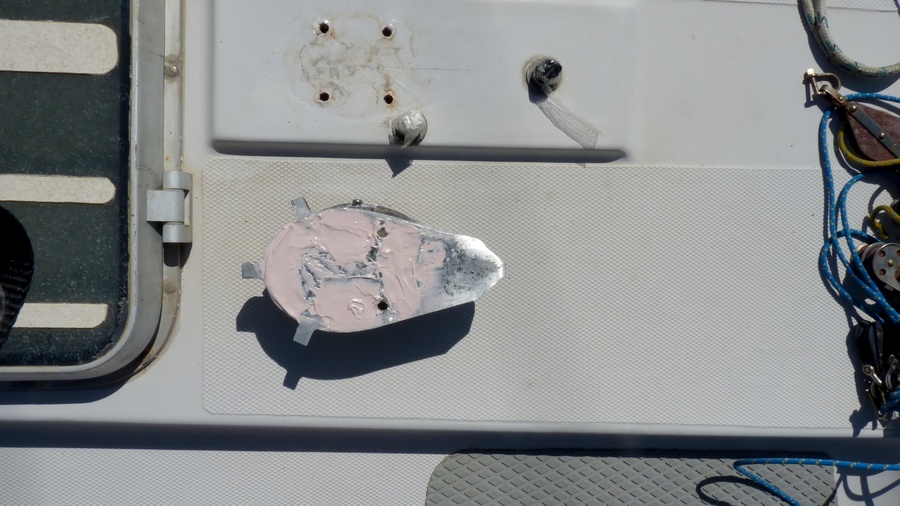
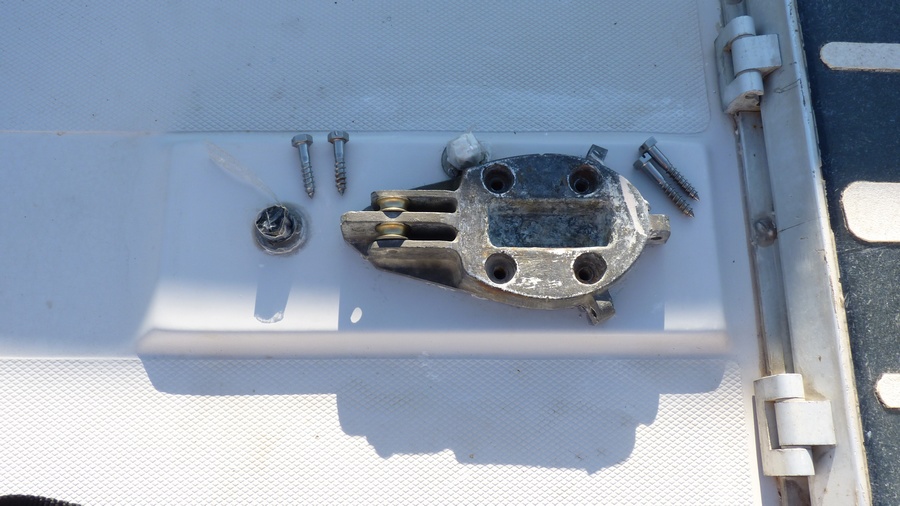
their lenses were made of very thick flat glass, as can be seen in the slideshow opposite. They were therefore replaced by navigation lights of similar dimensions made of polycarbonate and now equipped with Fresnel lenses. However, their range of two nautical miles, normal for this size of boat, was not satisfactory for the skipper. They were therefore adapted to receive more powerful LED lighting. The LED/Fresnel lens combination
thus increases their range, which should be a minimum of four nautical miles. Only the stern light, better protected and in better condition, remained in place. The filament bulb was also replaced with a LED, providing the necessary illumination and range. The color chosen for the LED lamps is cool white, which, with equivalent characteristics, provides slightly more light output. The use of LED lamps also results in significant savings
in onboard electrical energy consumption, thus increasing overall autonomy. |

|
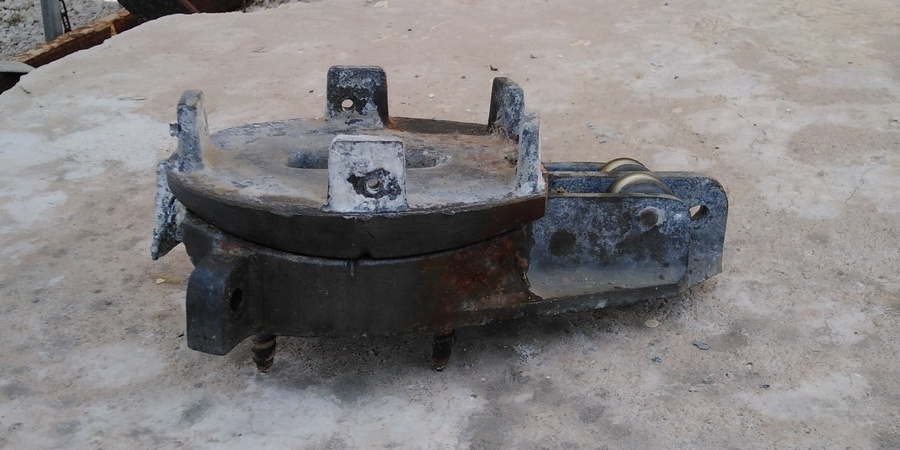
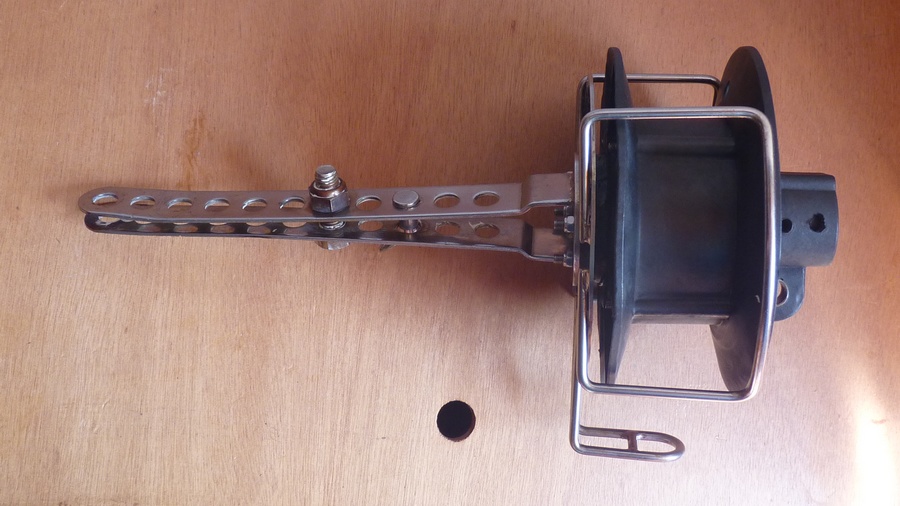
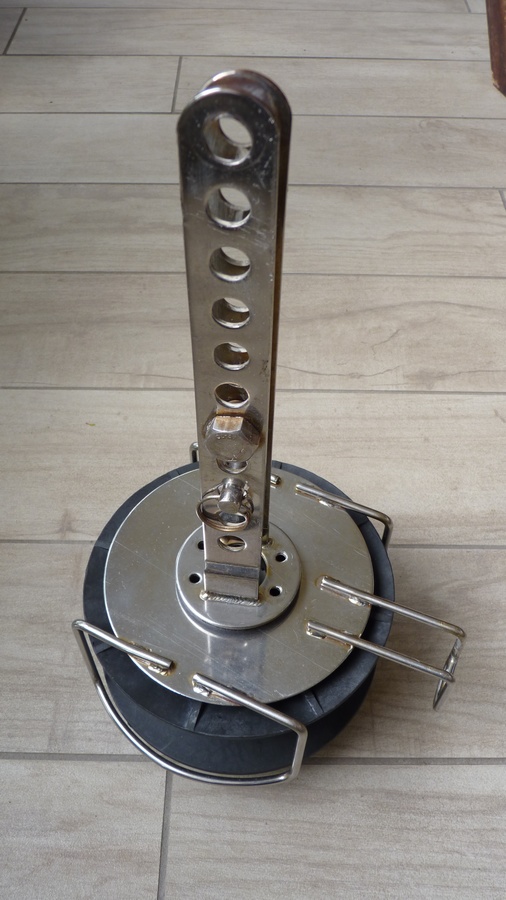
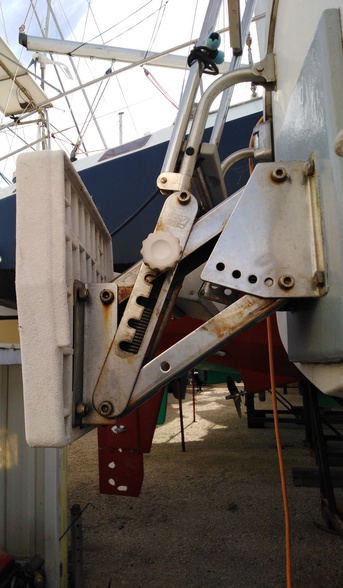
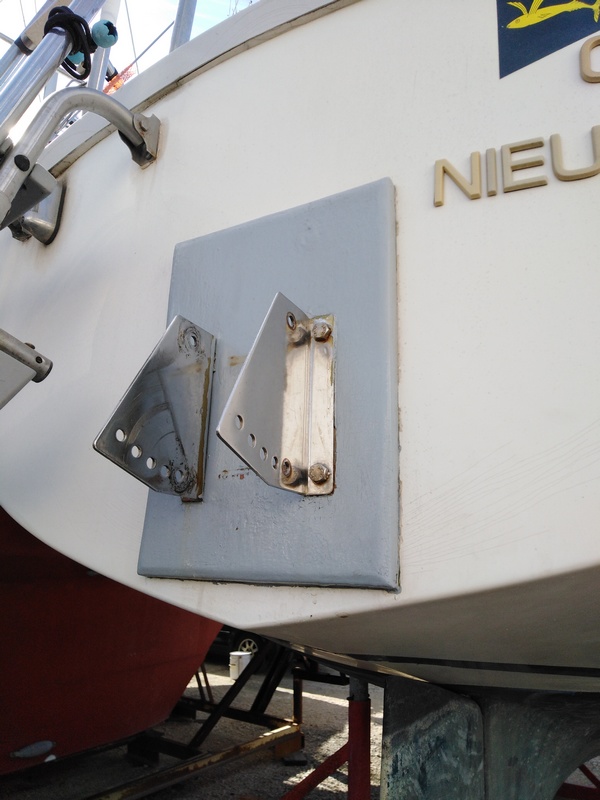
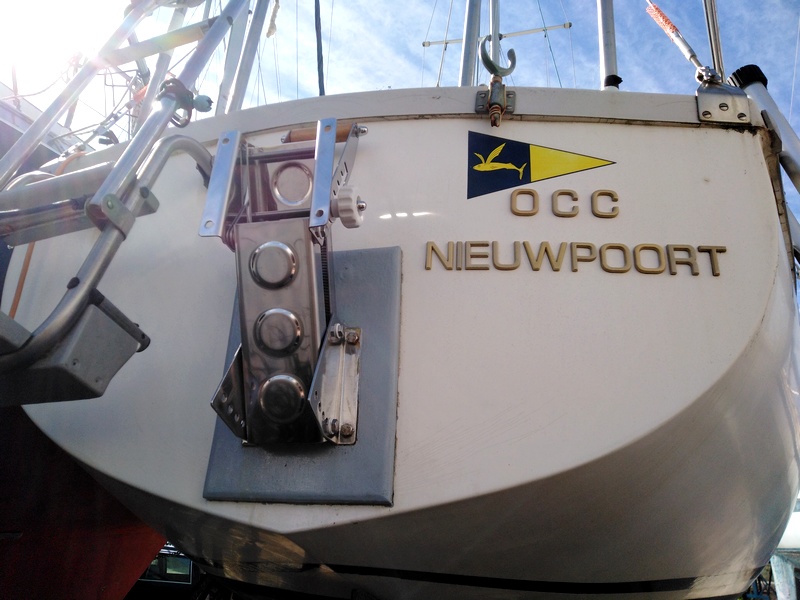
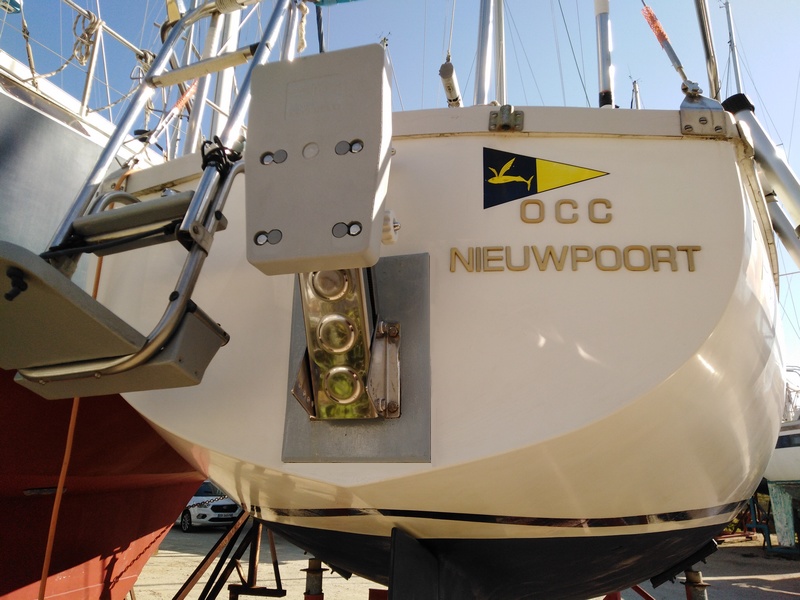
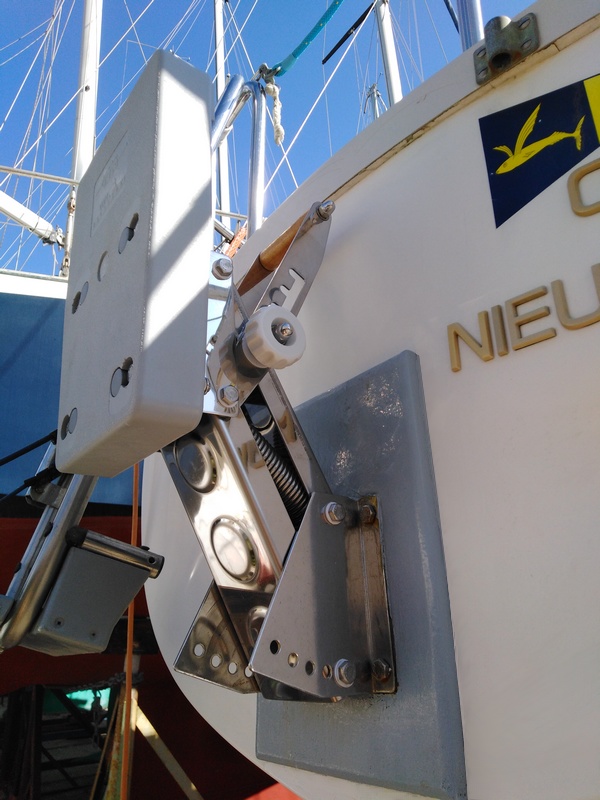
Although constructed of stainless steel, the engine mount has a thermoformed plastic panel. For some time now, it had been deteriorating, and the whole assembly was gradually crumbling to dust, worsening year after year. The two springs that raise the engine, also made of stainless steel, had already broken during a previous season. I was able to repair them, but last season they broke again. These springs are not available as spare parts. Perhaps they could be made by a machine shop. However, this all-stainless steel engine mount model is still manufactured. It seemed less expensive and more practical to buy a new one. Since the dimensions were the same, and to avoid dismantling the existing mount, whose stainless steel structure was obviously in good condition, the idea was simply to reuse the necessary parts from the new one. Furthermore, on the current model, the arm that lifts the engine has been lengthened, making it easier to grip and raise. This part was therefore also replaced and the stainless steel parts remaining in place were completely cleaned, thus giving the chair a new appearance. |
